American Cuisine
Red Velvet Cake
By Camille Doucet
Rate this recipe
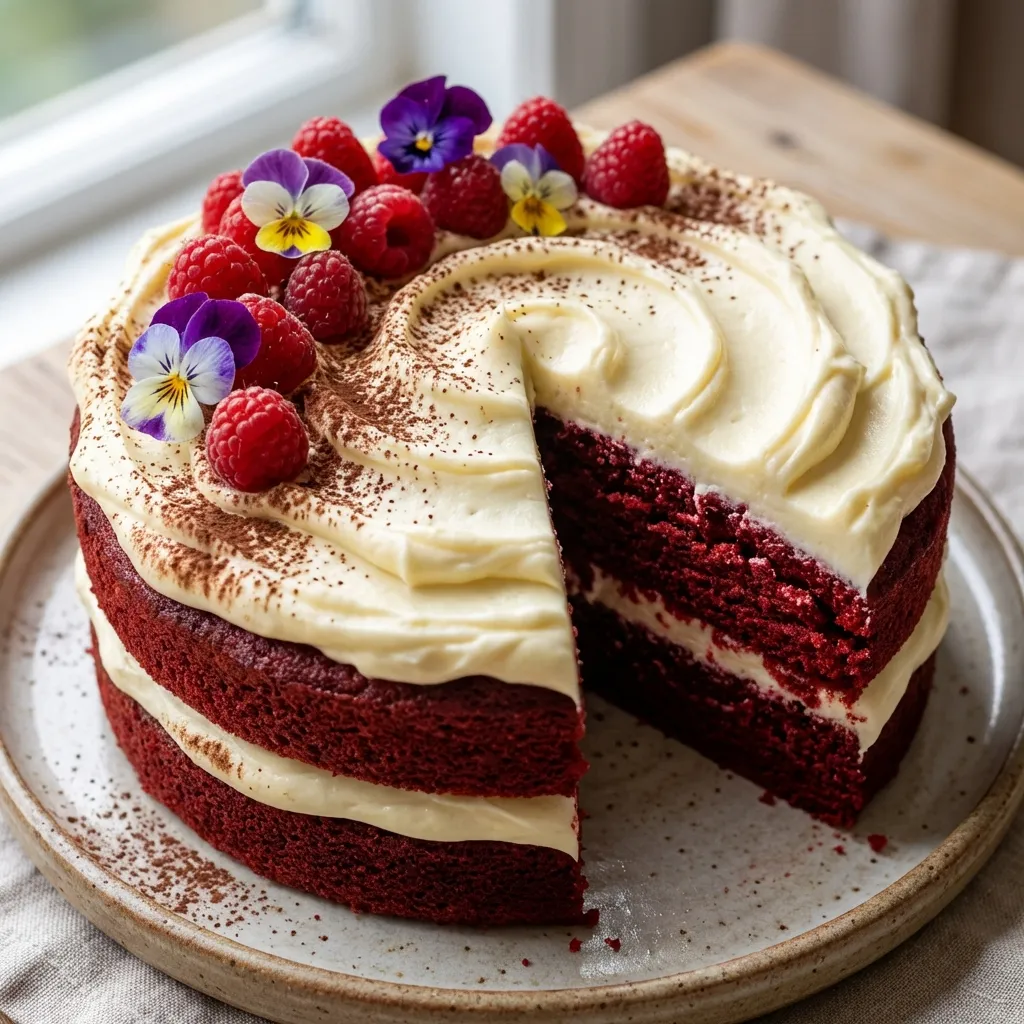
Red velvet's signature color was once an accident of chemistry, not a bottle of dye. Early twentieth-century cakes got their reddish-brown blush from a reaction between natural, non-alkalized cocoa powder and the acids in buttermilk and vinegar, which tinted the crumb mahogany. As Dutch-processed cocoa became common and muted that hue, bakers reached for food coloring to restore the drama, and the now-familiar crimson was born. The Southern United States adopted the cake as a celebration staple, and a famous 1989 film cemented its place at weddings and birthdays for a new generation. What people miss is that red velvet is not just chocolate cake in a costume. The tiny amount of cocoa is there for subtlety, a whisper of bitterness rather than a full chocolate flavor, while the buttermilk and vinegar do the real work: their acidity tenderizes the gluten and reacts with baking soda for a fine, plush crumb that genuinely earns the word velvet. Oil rather than butter keeps that crumb moist for days. The traditional partner is cream cheese frosting, whose tang cuts the sweetness and echoes the cake's faint sourness; it replaced the older ermine, or boiled-flour, frosting in most modern kitchens. Get the acid balance right and you understand why this cake survived a century of fashion to remain a centerpiece for Valentine's Day and the holidays.
Ingredients
Serves 12Instructions
- 1
Preheat oven to 350°F (175°C). Grease and flour two 9-inch round cake pans.
- 2
In a medium bowl, sift together the flour, sugar, baking soda, salt, and cocoa powder.
- 3
In a large bowl, whisk together the vegetable oil, buttermilk, eggs, food coloring, vinegar, and vanilla extract.
- 4
Add the dry ingredients to the wet ingredients and mix just until combined and smooth.
- 5
Divide the batter evenly between prepared pans. Bake for 30 minutes, or until a toothpick comes out clean.
- 6
Cool in pans for 10 minutes, then transfer to a wire rack to cool completely.
- 7
For the frosting: Beat cream cheese and butter until smooth. Add powdered sugar and vanilla, beating until fluffy.
- 8
Frost the tops and sides of the cooled cake layers. Slice and serve.
Chef's Tips
- ✦ Use gel food coloring rather than liquid for a vivid color without thinning the batter or adding off-flavors.
- ✦ Bring eggs and buttermilk to room temperature so the batter emulsifies evenly and bakes with a uniform crumb.
- ✦ Add the vinegar last and fold gently; it begins reacting with the baking soda immediately, so get the batter into the oven promptly for maximum lift.
- ✦ Cool the layers completely, ideally chilled, before frosting; cream cheese frosting slides off warm cake.
- ✦ Do not overbeat the cream cheese frosting. Beat just until smooth, because excess mixing breaks the structure and turns it runny.
- ✦ Level the domed tops with a serrated knife and save the trimmings to crumb the sides for the classic red velvet finish.
Ingredient Substitutions
-
buttermilk → 1 cup milk plus 1 tbsp lemon juice or vinegar, rested 5 minutes
The acidity is essential for tenderness and the baking-soda reaction, so do not use plain milk alone.
-
red food coloring → beet powder or beet juice, or simply omit
Beet gives a natural but more muted red; without any colorant the cake bakes a brownish hue but tastes identical.
-
cake flour → all-purpose flour minus 2 tbsp per cup, plus 2 tbsp cornstarch per cup
Reproduces cake flour's lower protein for a softer crumb; sift well to combine.
-
vegetable oil → canola, sunflower, or melted coconut oil
Any neutral oil works one-for-one; coconut oil adds a faint flavor and must be warm so it does not seize in cold buttermilk.
-
cream cheese → mascarpone, or a stabilized whipped-cream frosting
Mascarpone is milder and less tangy; keep it cold and do not overbeat or the frosting loosens.
-
white vinegar → apple cider vinegar or lemon juice
Same teaspoon amount; any mild acid activates the baking soda and brightens the crumb.
Tags
Frequently Asked Questions
What makes red velvet cake different from chocolate cake? ▼
Red velvet uses only about a teaspoon of cocoa for a subtle hint rather than full chocolate flavor, and it relies on buttermilk and vinegar for a tangy, exceptionally tender crumb. Chocolate cake uses far more cocoa or melted chocolate and tastes distinctly chocolatey.
Can I make red velvet cake without food coloring? ▼
Yes. The color is purely cosmetic. Omit it for a natural brownish cake, or use beet powder or beet juice for a muted, natural red. The flavor and texture are unchanged either way.
How do I store a frosted red velvet cake? ▼
Because of the cream cheese frosting, refrigerate it covered for up to 5 days. Cream cheese frosting should not sit at room temperature more than about 2 hours. Bring slices to room temperature for 30 minutes before serving for the best texture.
Can I freeze red velvet cake? ▼
Yes. Freeze unfrosted layers wrapped in plastic and foil for up to 3 months, which also makes them easier to frost. Frosted cake can be frozen up to 1 month; thaw overnight in the refrigerator.
How do I know when the layers are done? ▼
A toothpick inserted in the center comes out clean or with a few dry crumbs, the top springs back when lightly pressed, and the edges just begin to pull from the pan. Avoid opening the oven before 25 minutes, which can deflate the rise.
Can I make this as cupcakes or a sheet cake? ▼
Yes. The batter makes about 24 cupcakes; bake at 350°F (175°C) for 18 to 20 minutes. For a 9x13 sheet cake, bake 30 to 35 minutes. Test with a toothpick in all cases.
Why is my cream cheese frosting runny? ▼
Usually overbeating or warm ingredients. Use cold, full-fat cream cheese and softened (not melted) butter, beat only until smooth, and chill the frosting 15 to 20 minutes if it loosens before spreading.